Well, why not?? Nothing says “first snowfall of the year” like curling up with a hot beverage and your favorite Agatha Christie.
Hence, I present you with some Christie-themed paper snowflake cutouts!

Okay, that’s about the only logical connection I can make between those tiny, delicate, fractalized bits of winter fluff and murder most foul. I’ve made oddly-themed paper snowflake cut-outs before, so I just thought I’d give this theme a try, too. Not recommended for general Christmas decoration, but hey, for a wintery murder mystery party…? Or, you know, just to freak out your husband. 🙂
The technique for folding and cutting a standard 6-point snowflake is pretty common, but the specific designs here are my own. You’re welcome to use them if you want to; they are universally free for anyone crazy enough to want to try this project. I include specific instructions for cutting out the Poirot design below.
First, gather your materials: an X-Acto knife, a very sharp pair of scissors (I like the Cutter Bee scissors by EK Tools), a metal ruler (optional), a pencil, and a piece of paper. You want paper that is relatively thin but not tissue-y, as you’ll need to cut small pieces of it with your knife. Origami paper would doubtless work well; I like using plain white paper from the printer. A piece of paper that is too small will be more difficult to fold and cut through.
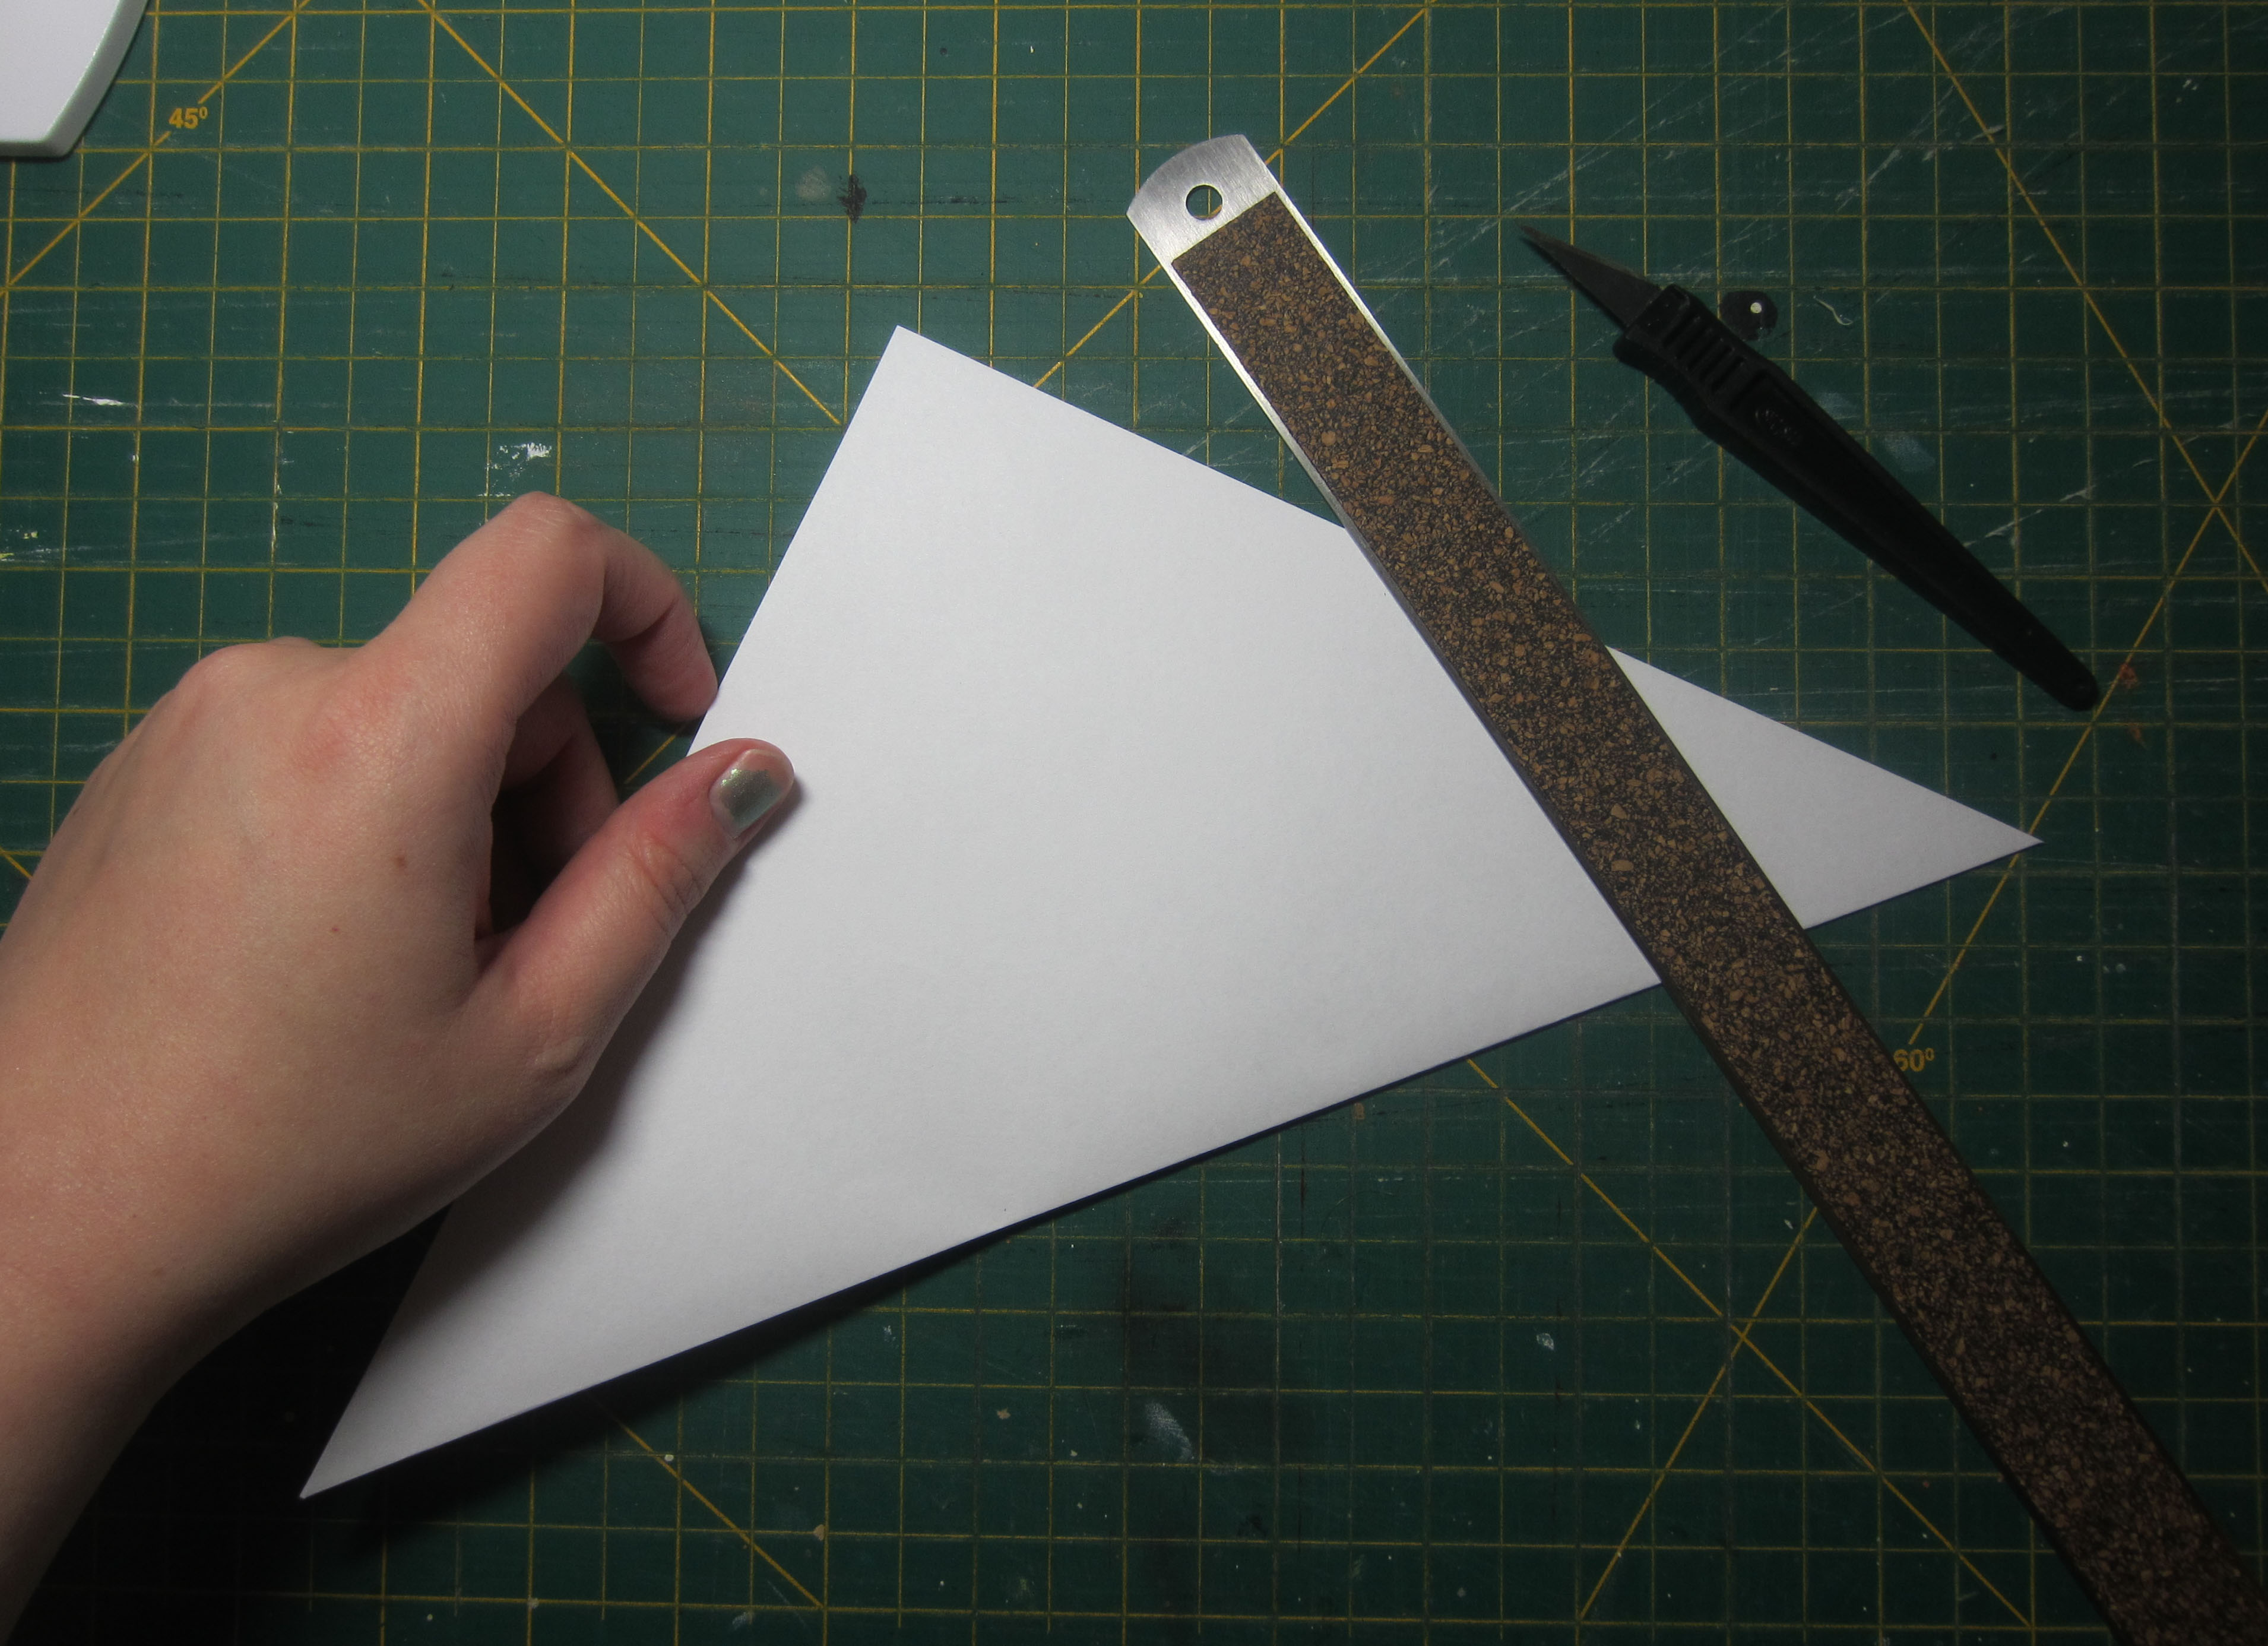
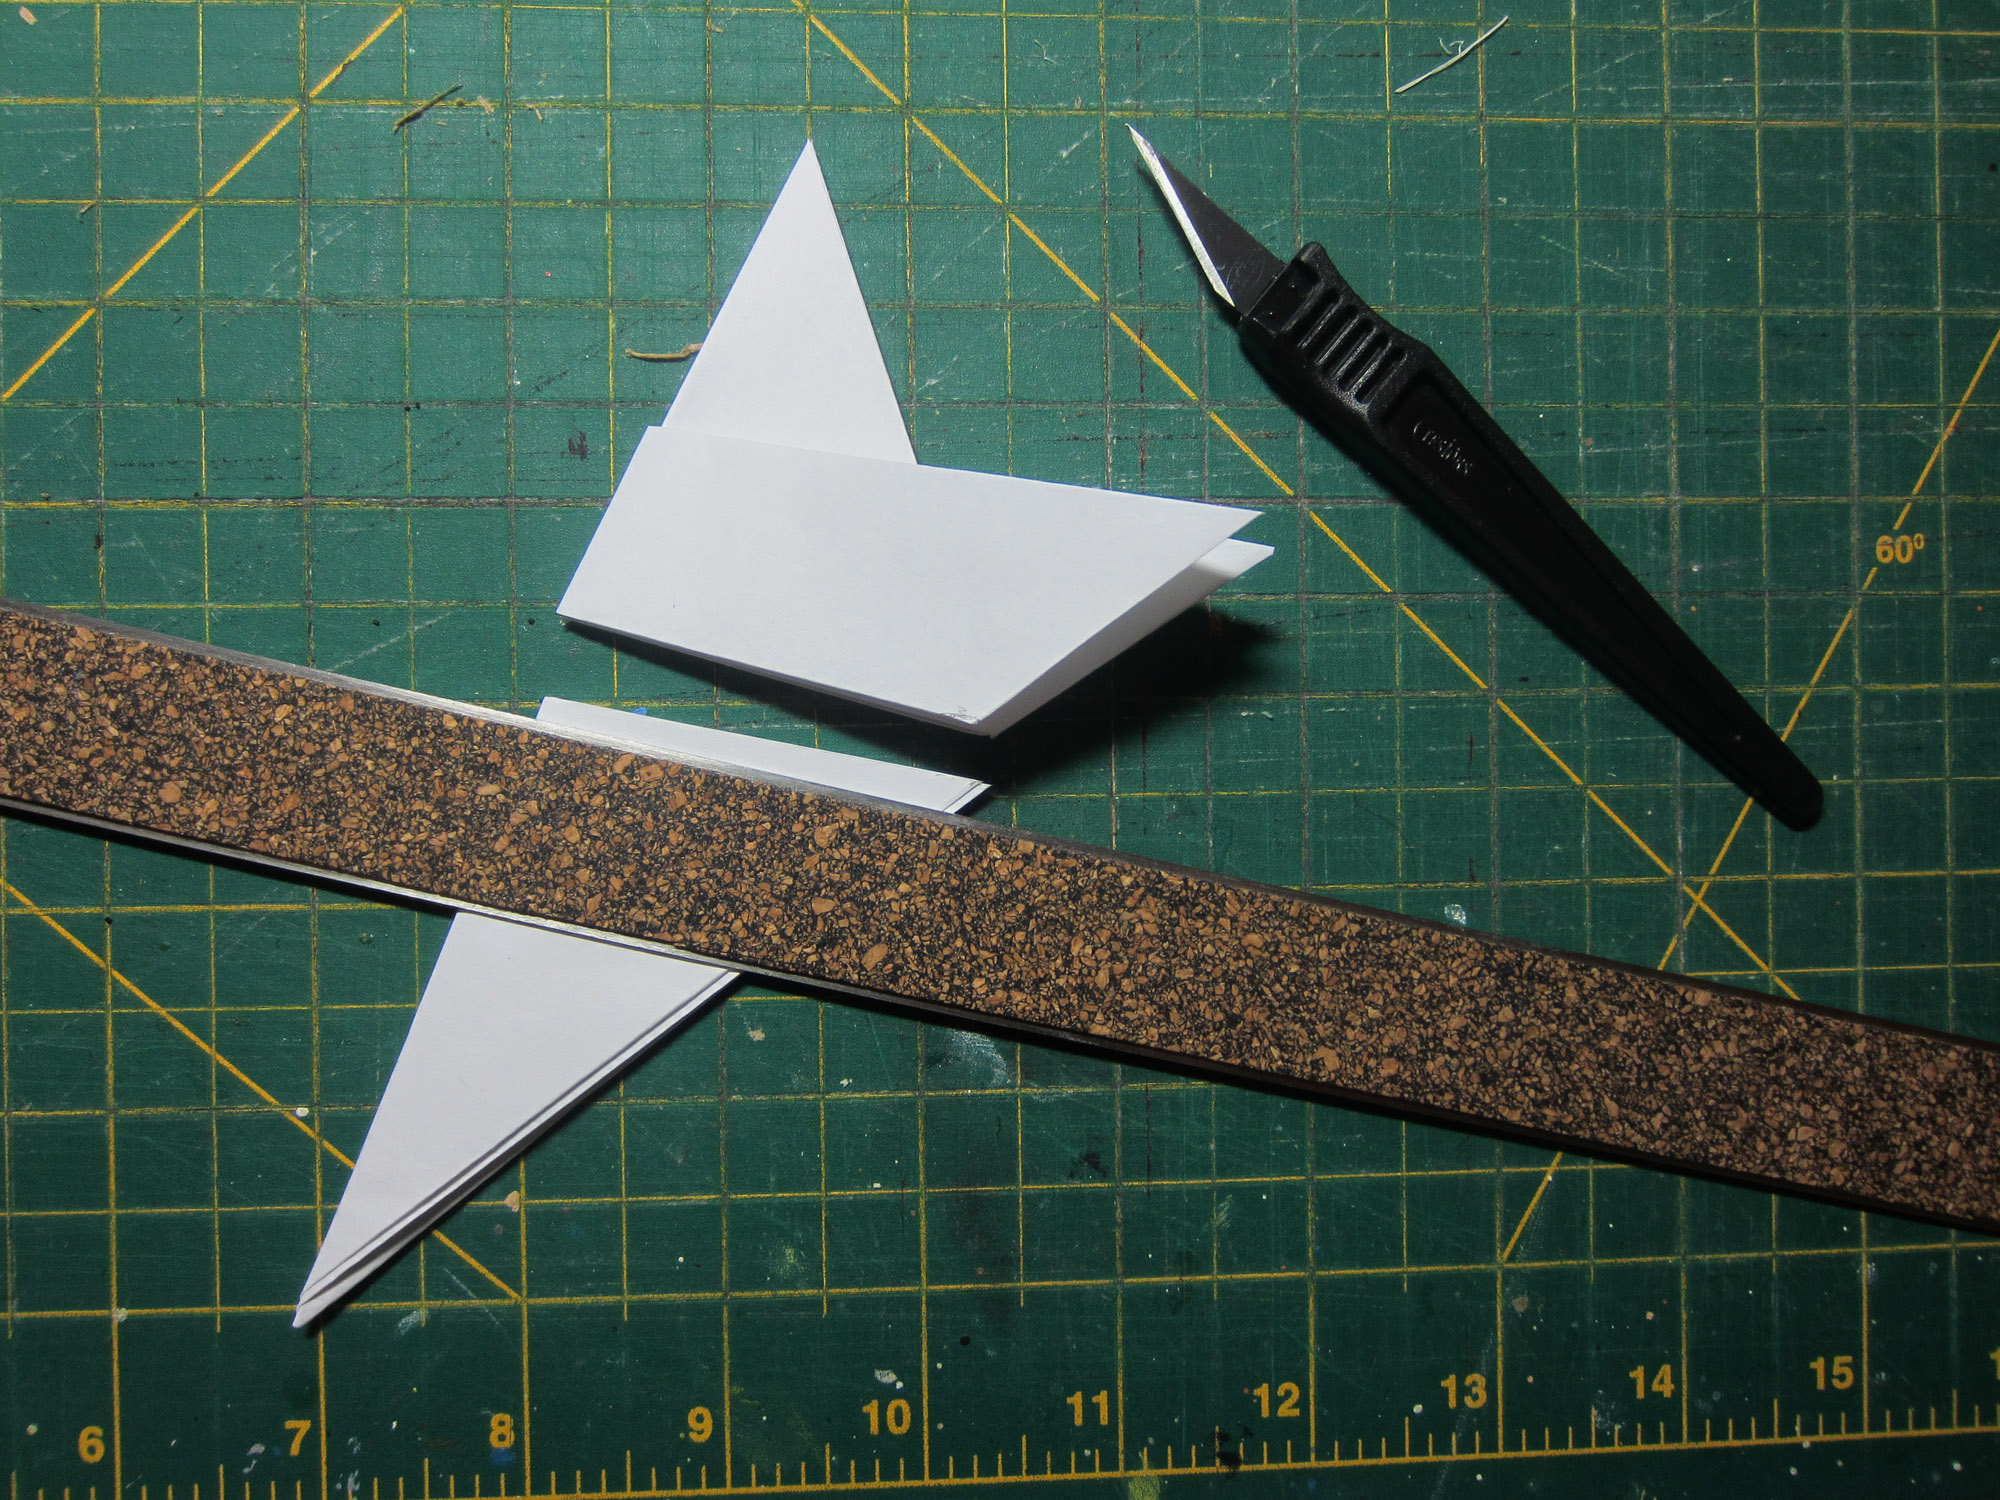
1. Fold paper diagonally to make your large triangle; if your paper is not already square, trim the excess rectangle using the ruler and your X-Acto knife. Scissors work, too.
2. Fold triangle in half again.
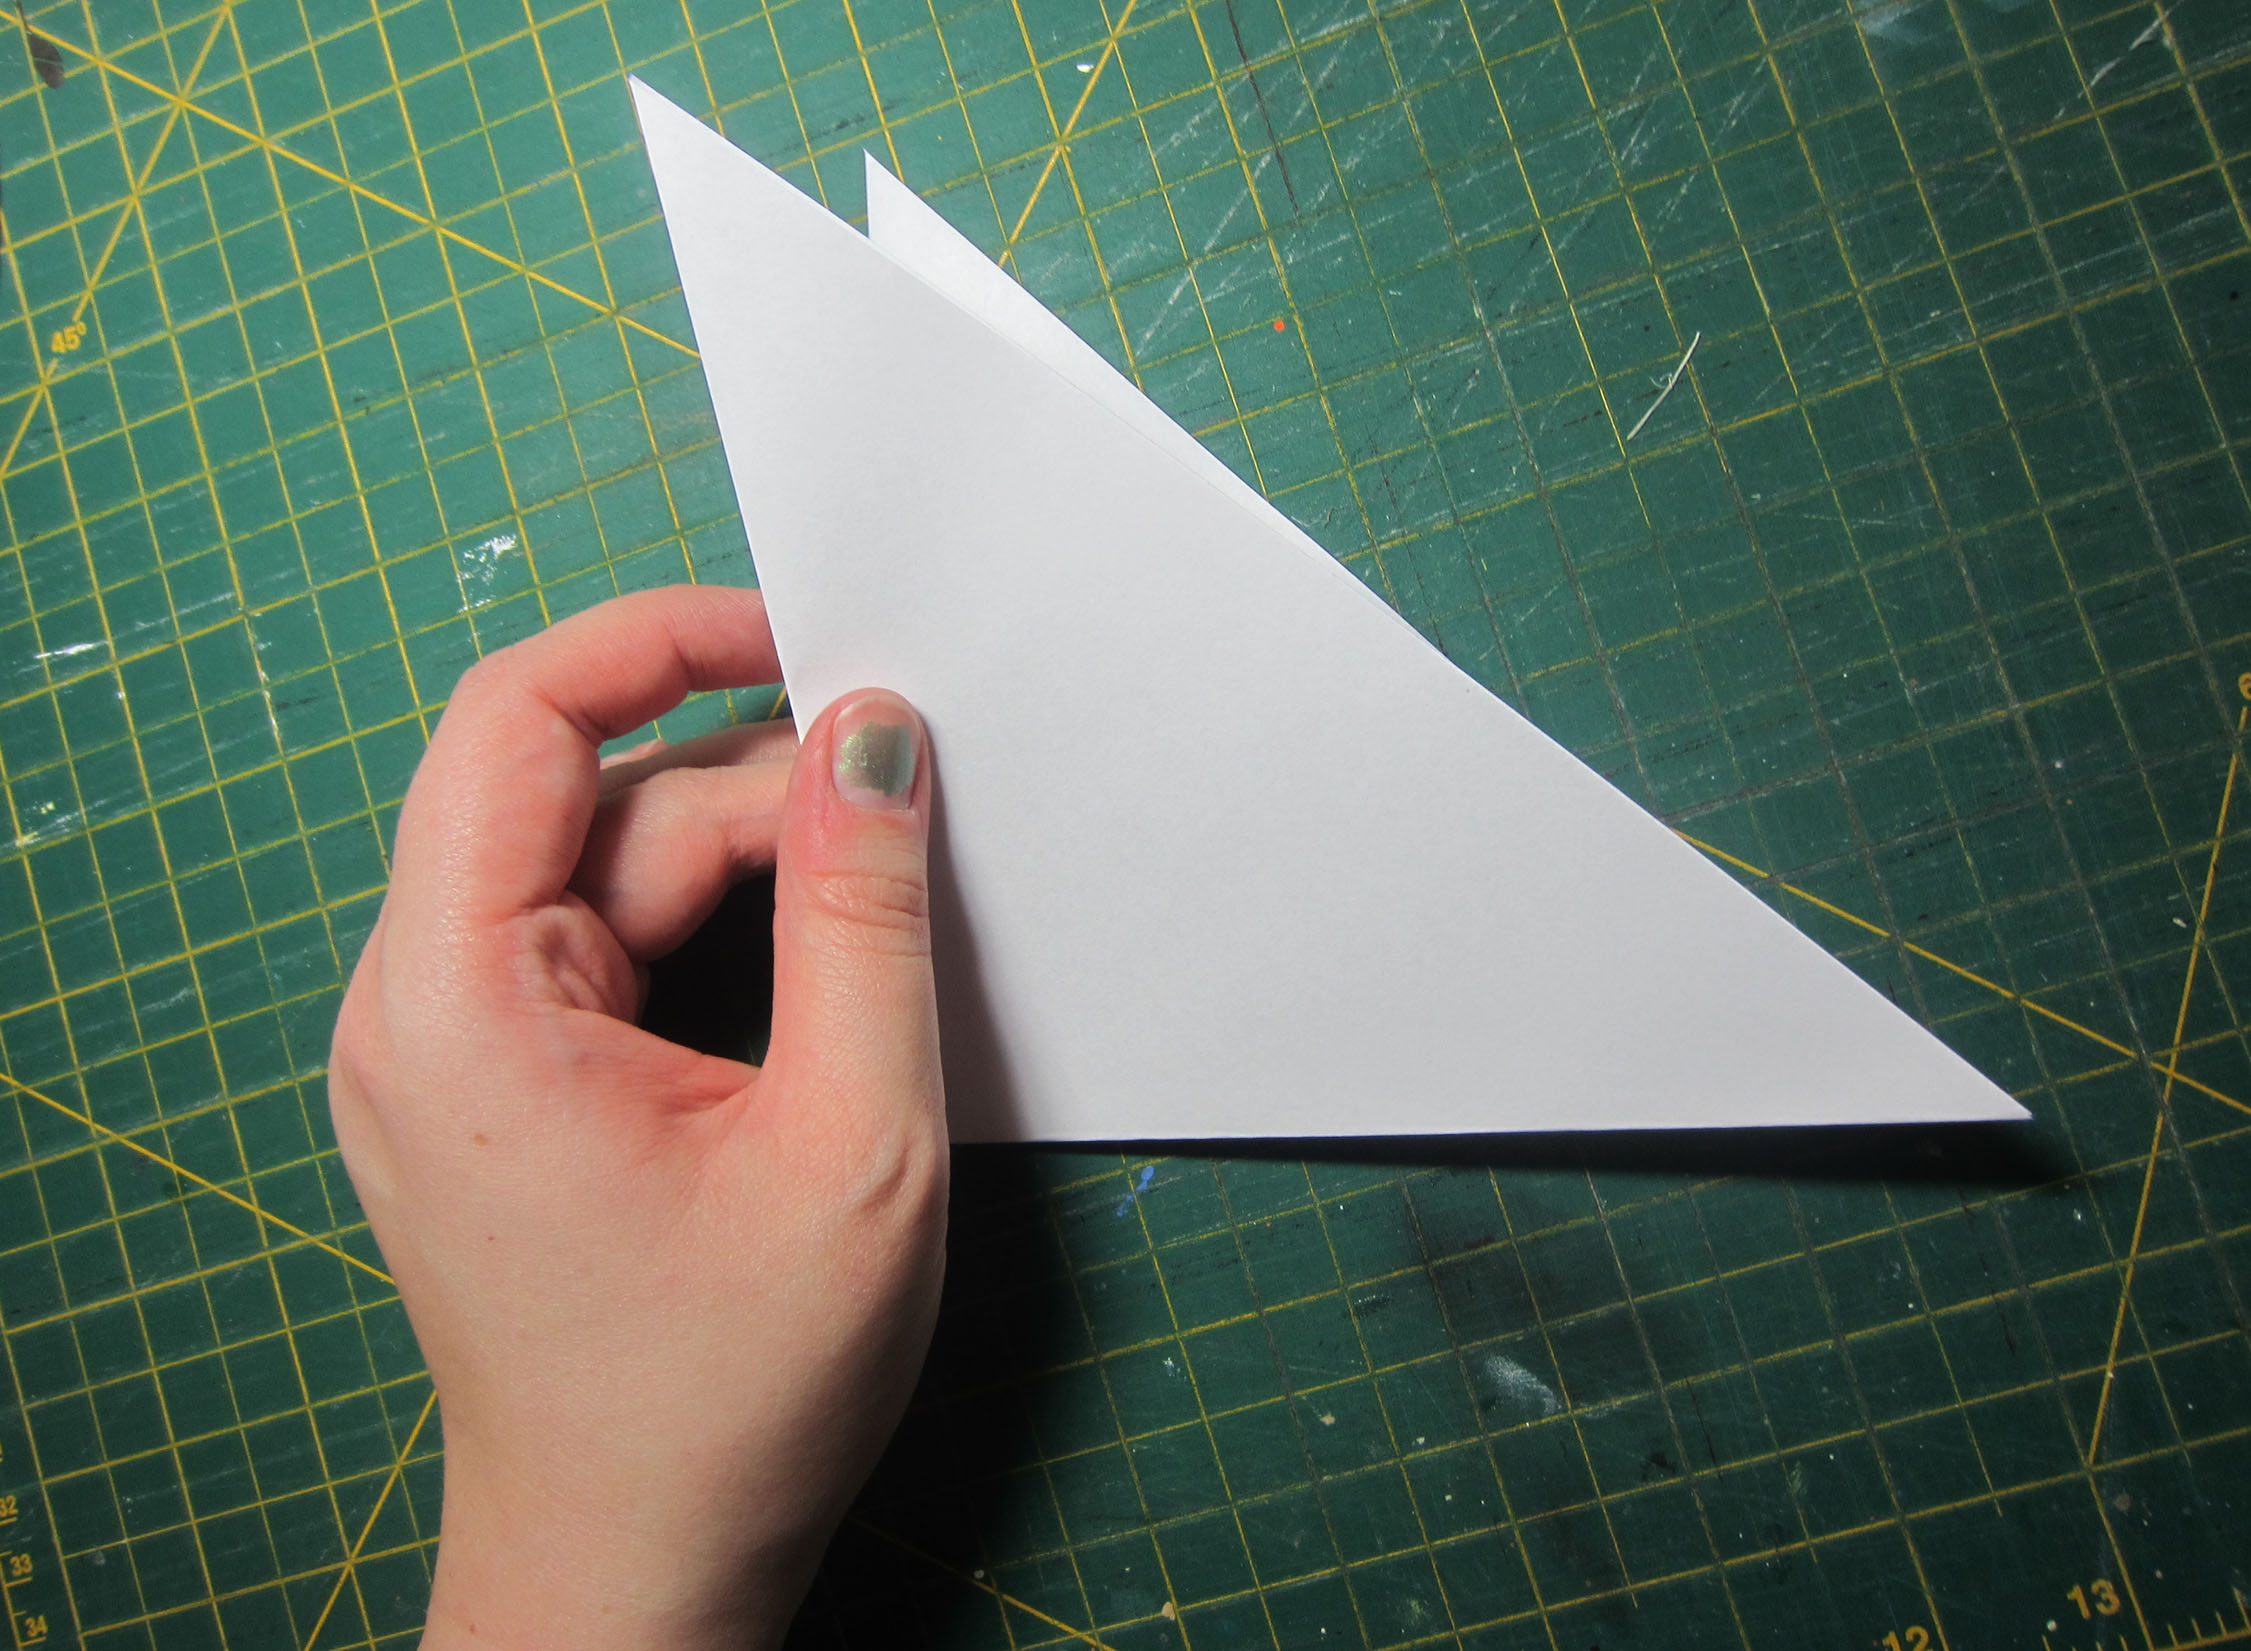
3. Now you’re going to fold this triangle into “thirds,” keeping the center point of your square as the bottom point of your folded paper. It takes a little practice to learn where to make your alignments along that top edge. Steps 3 and 4 go together, so take a look at the photos…
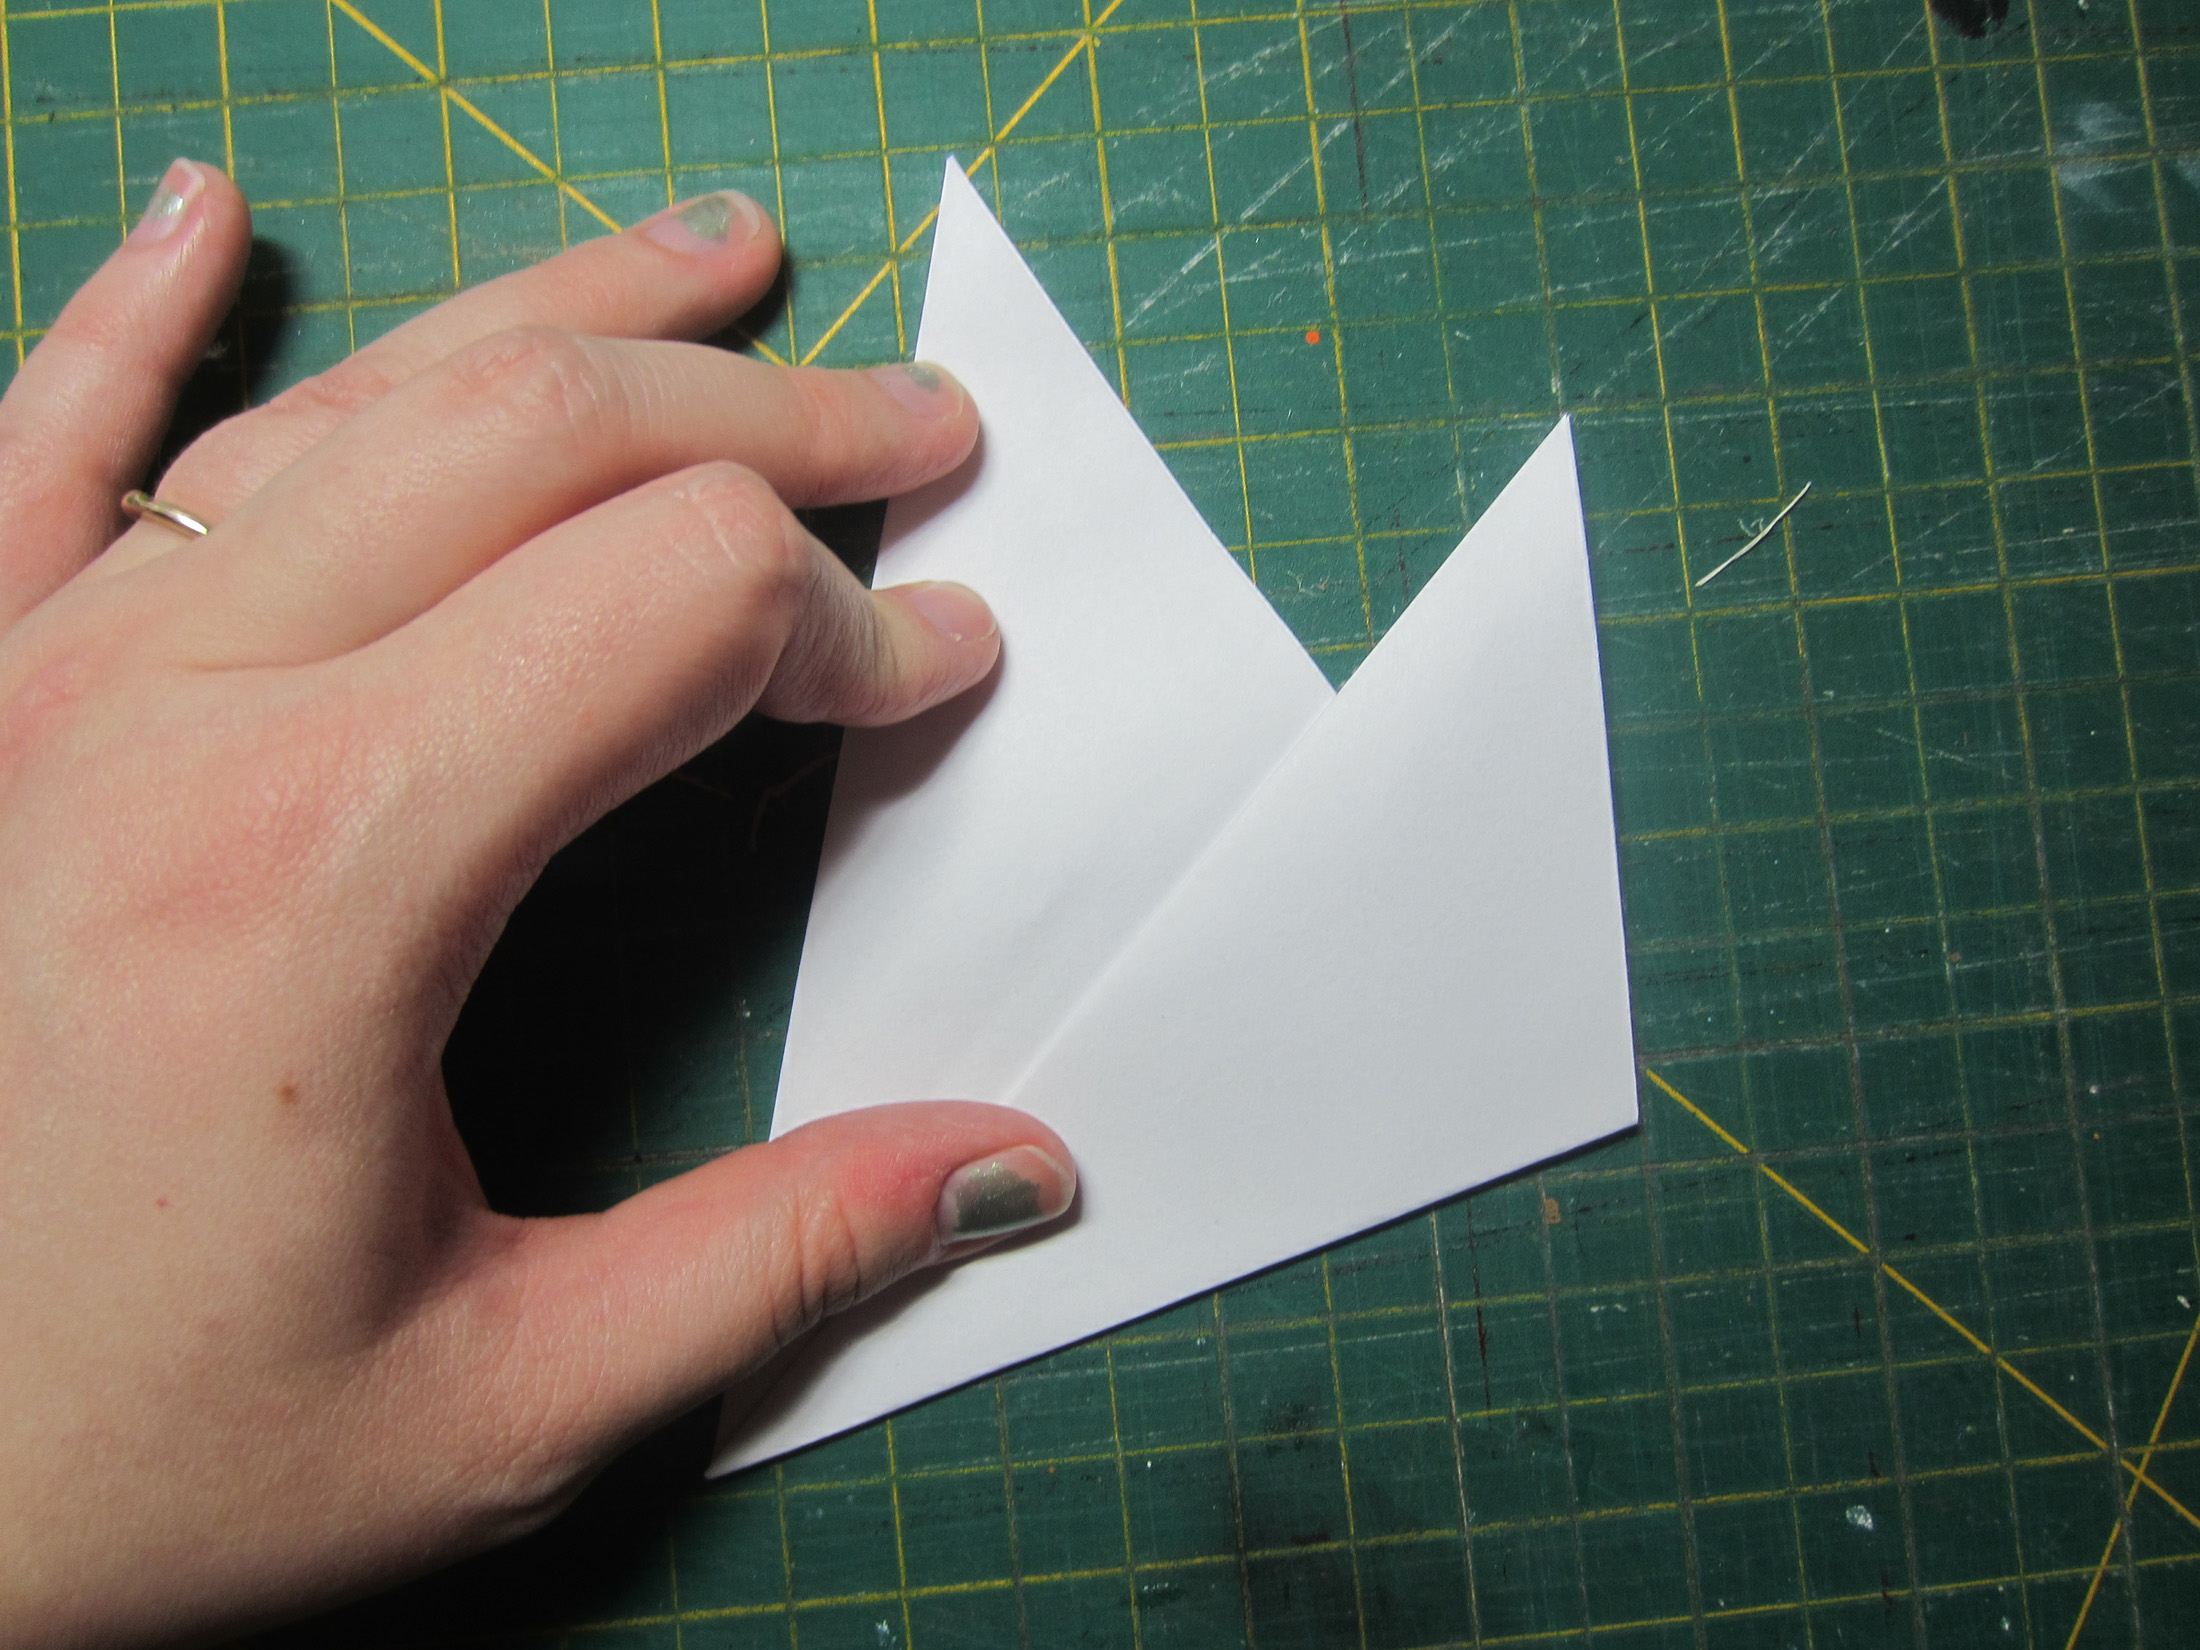
4. …And after you’ve folded the right corner up, fold the left side over so that it’s lined up along the far edge. You want the outer edges as closely and compactly lined up with each other as possible.
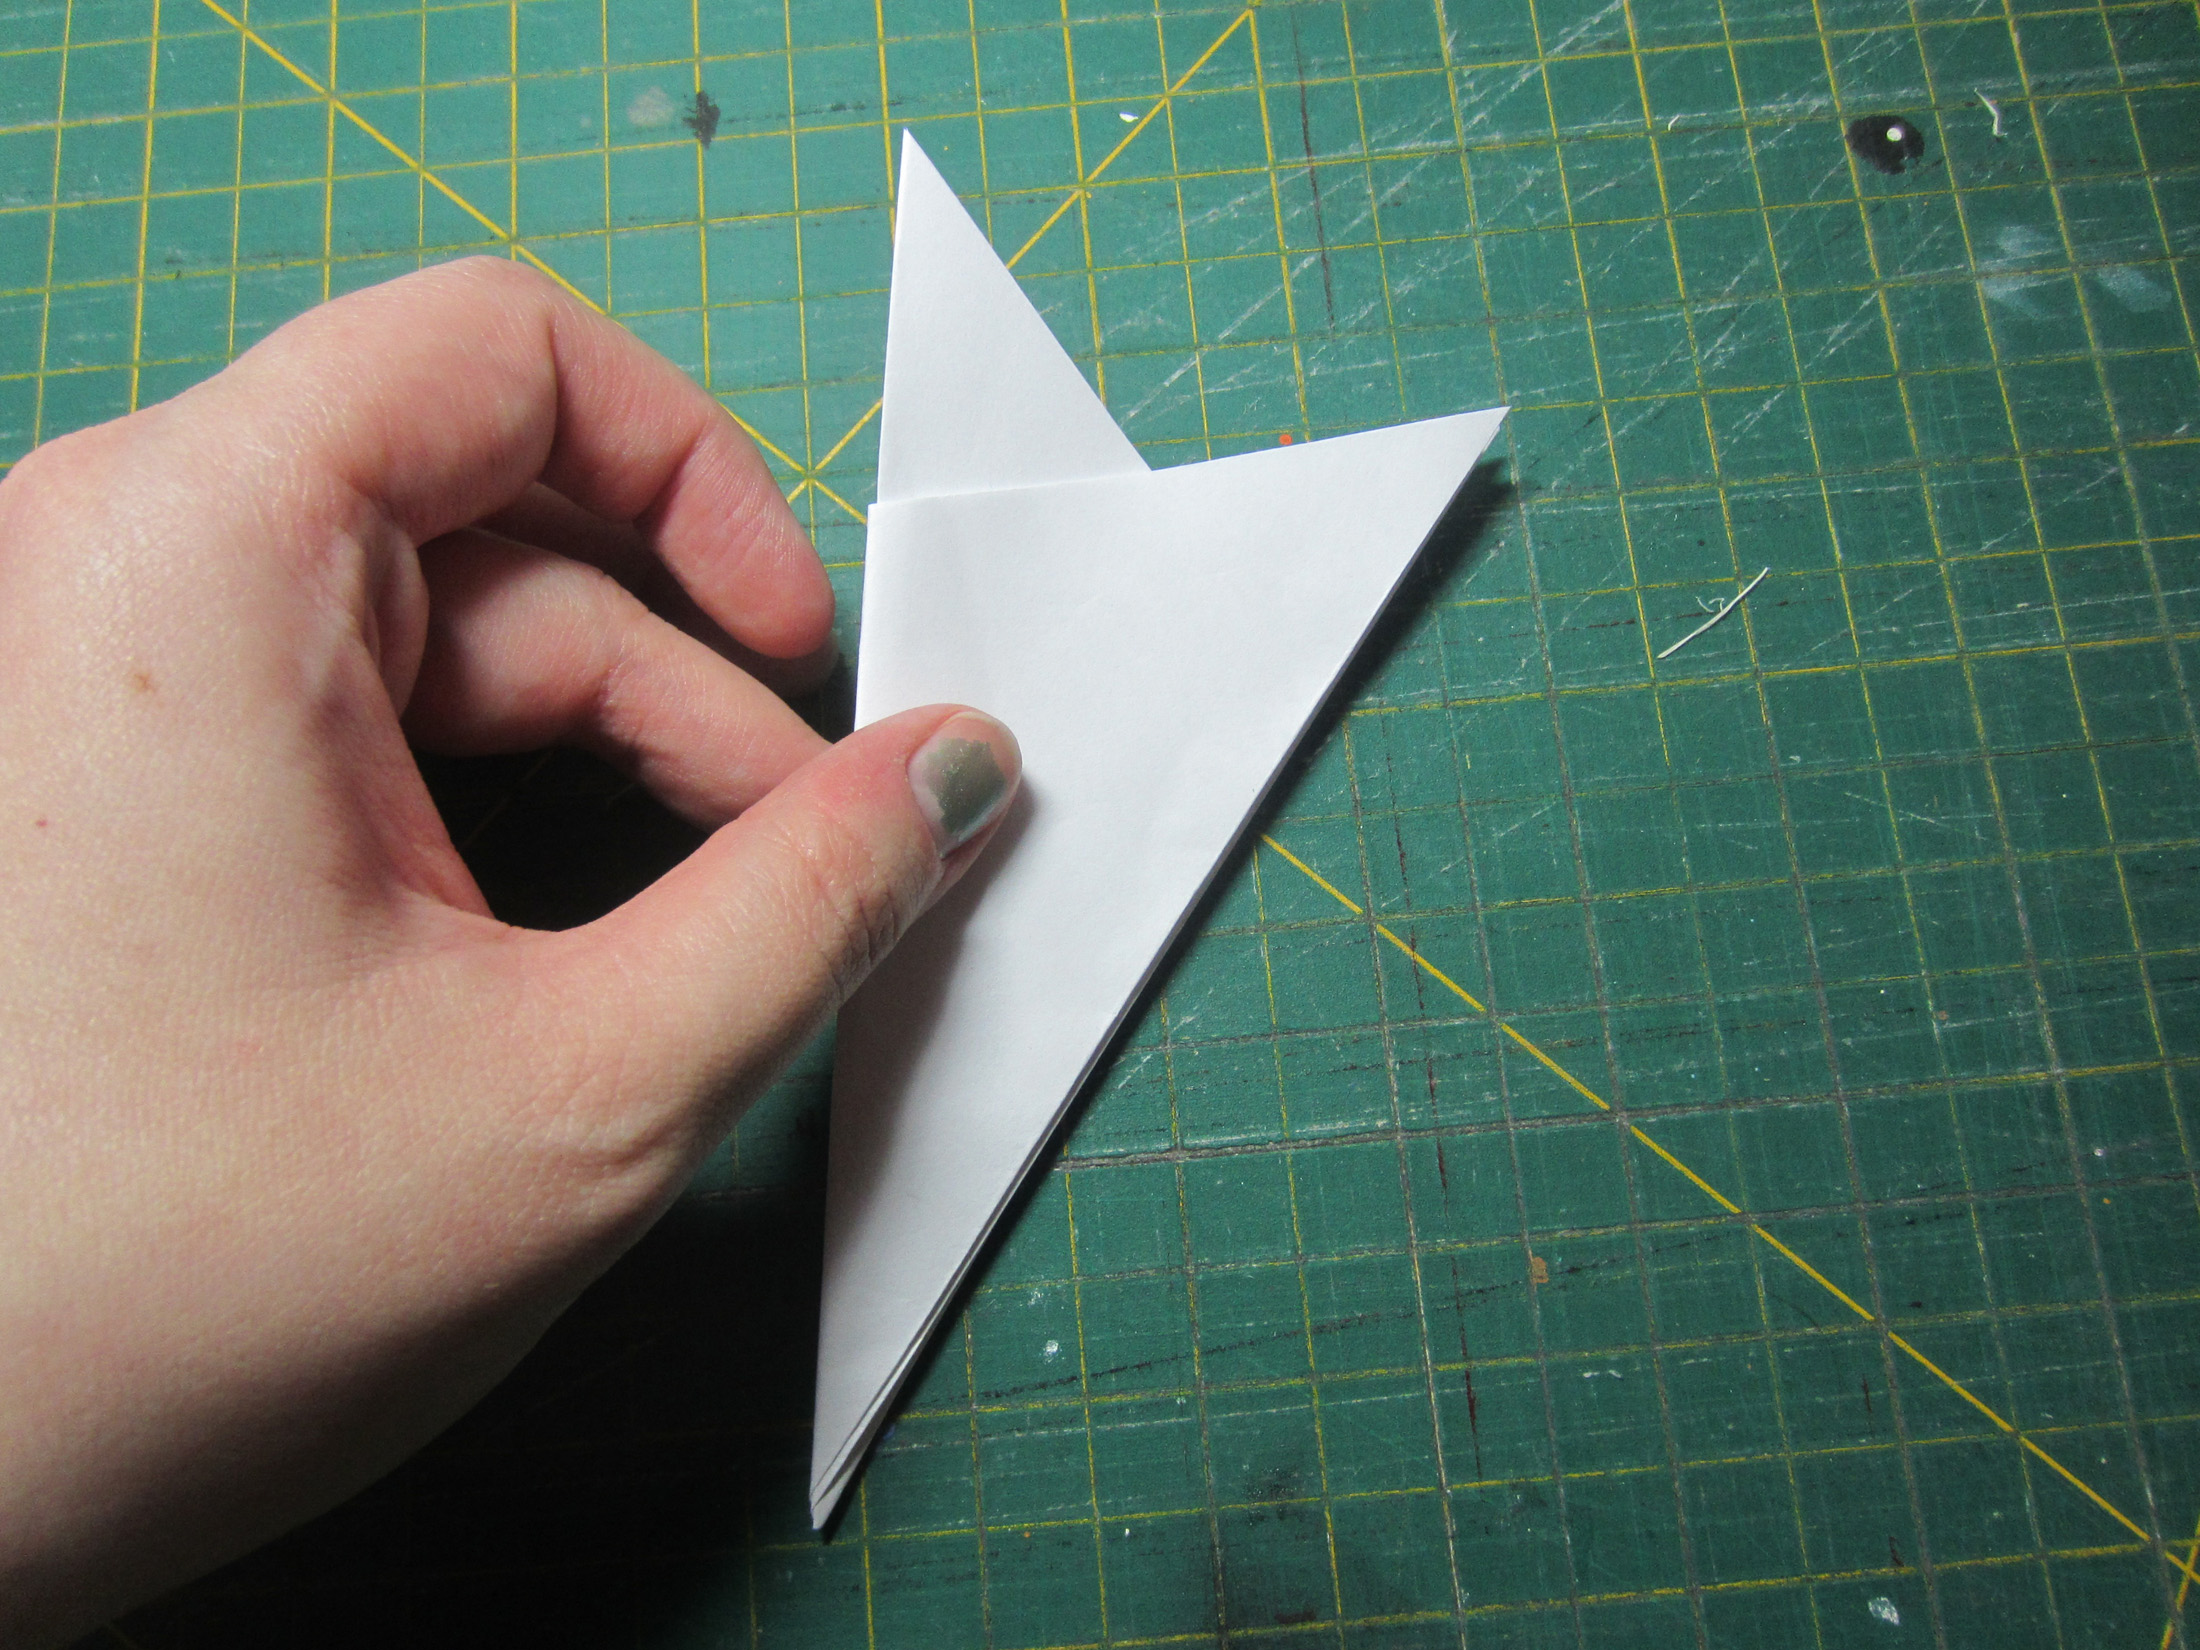
5. Next, you’re going to cut off the top part, going through ALL the layers (if you peek on the reverse side, you’ll see where all the layers are) at an angle. It doesn’t matter at which angle you cut; different cuts give different results.
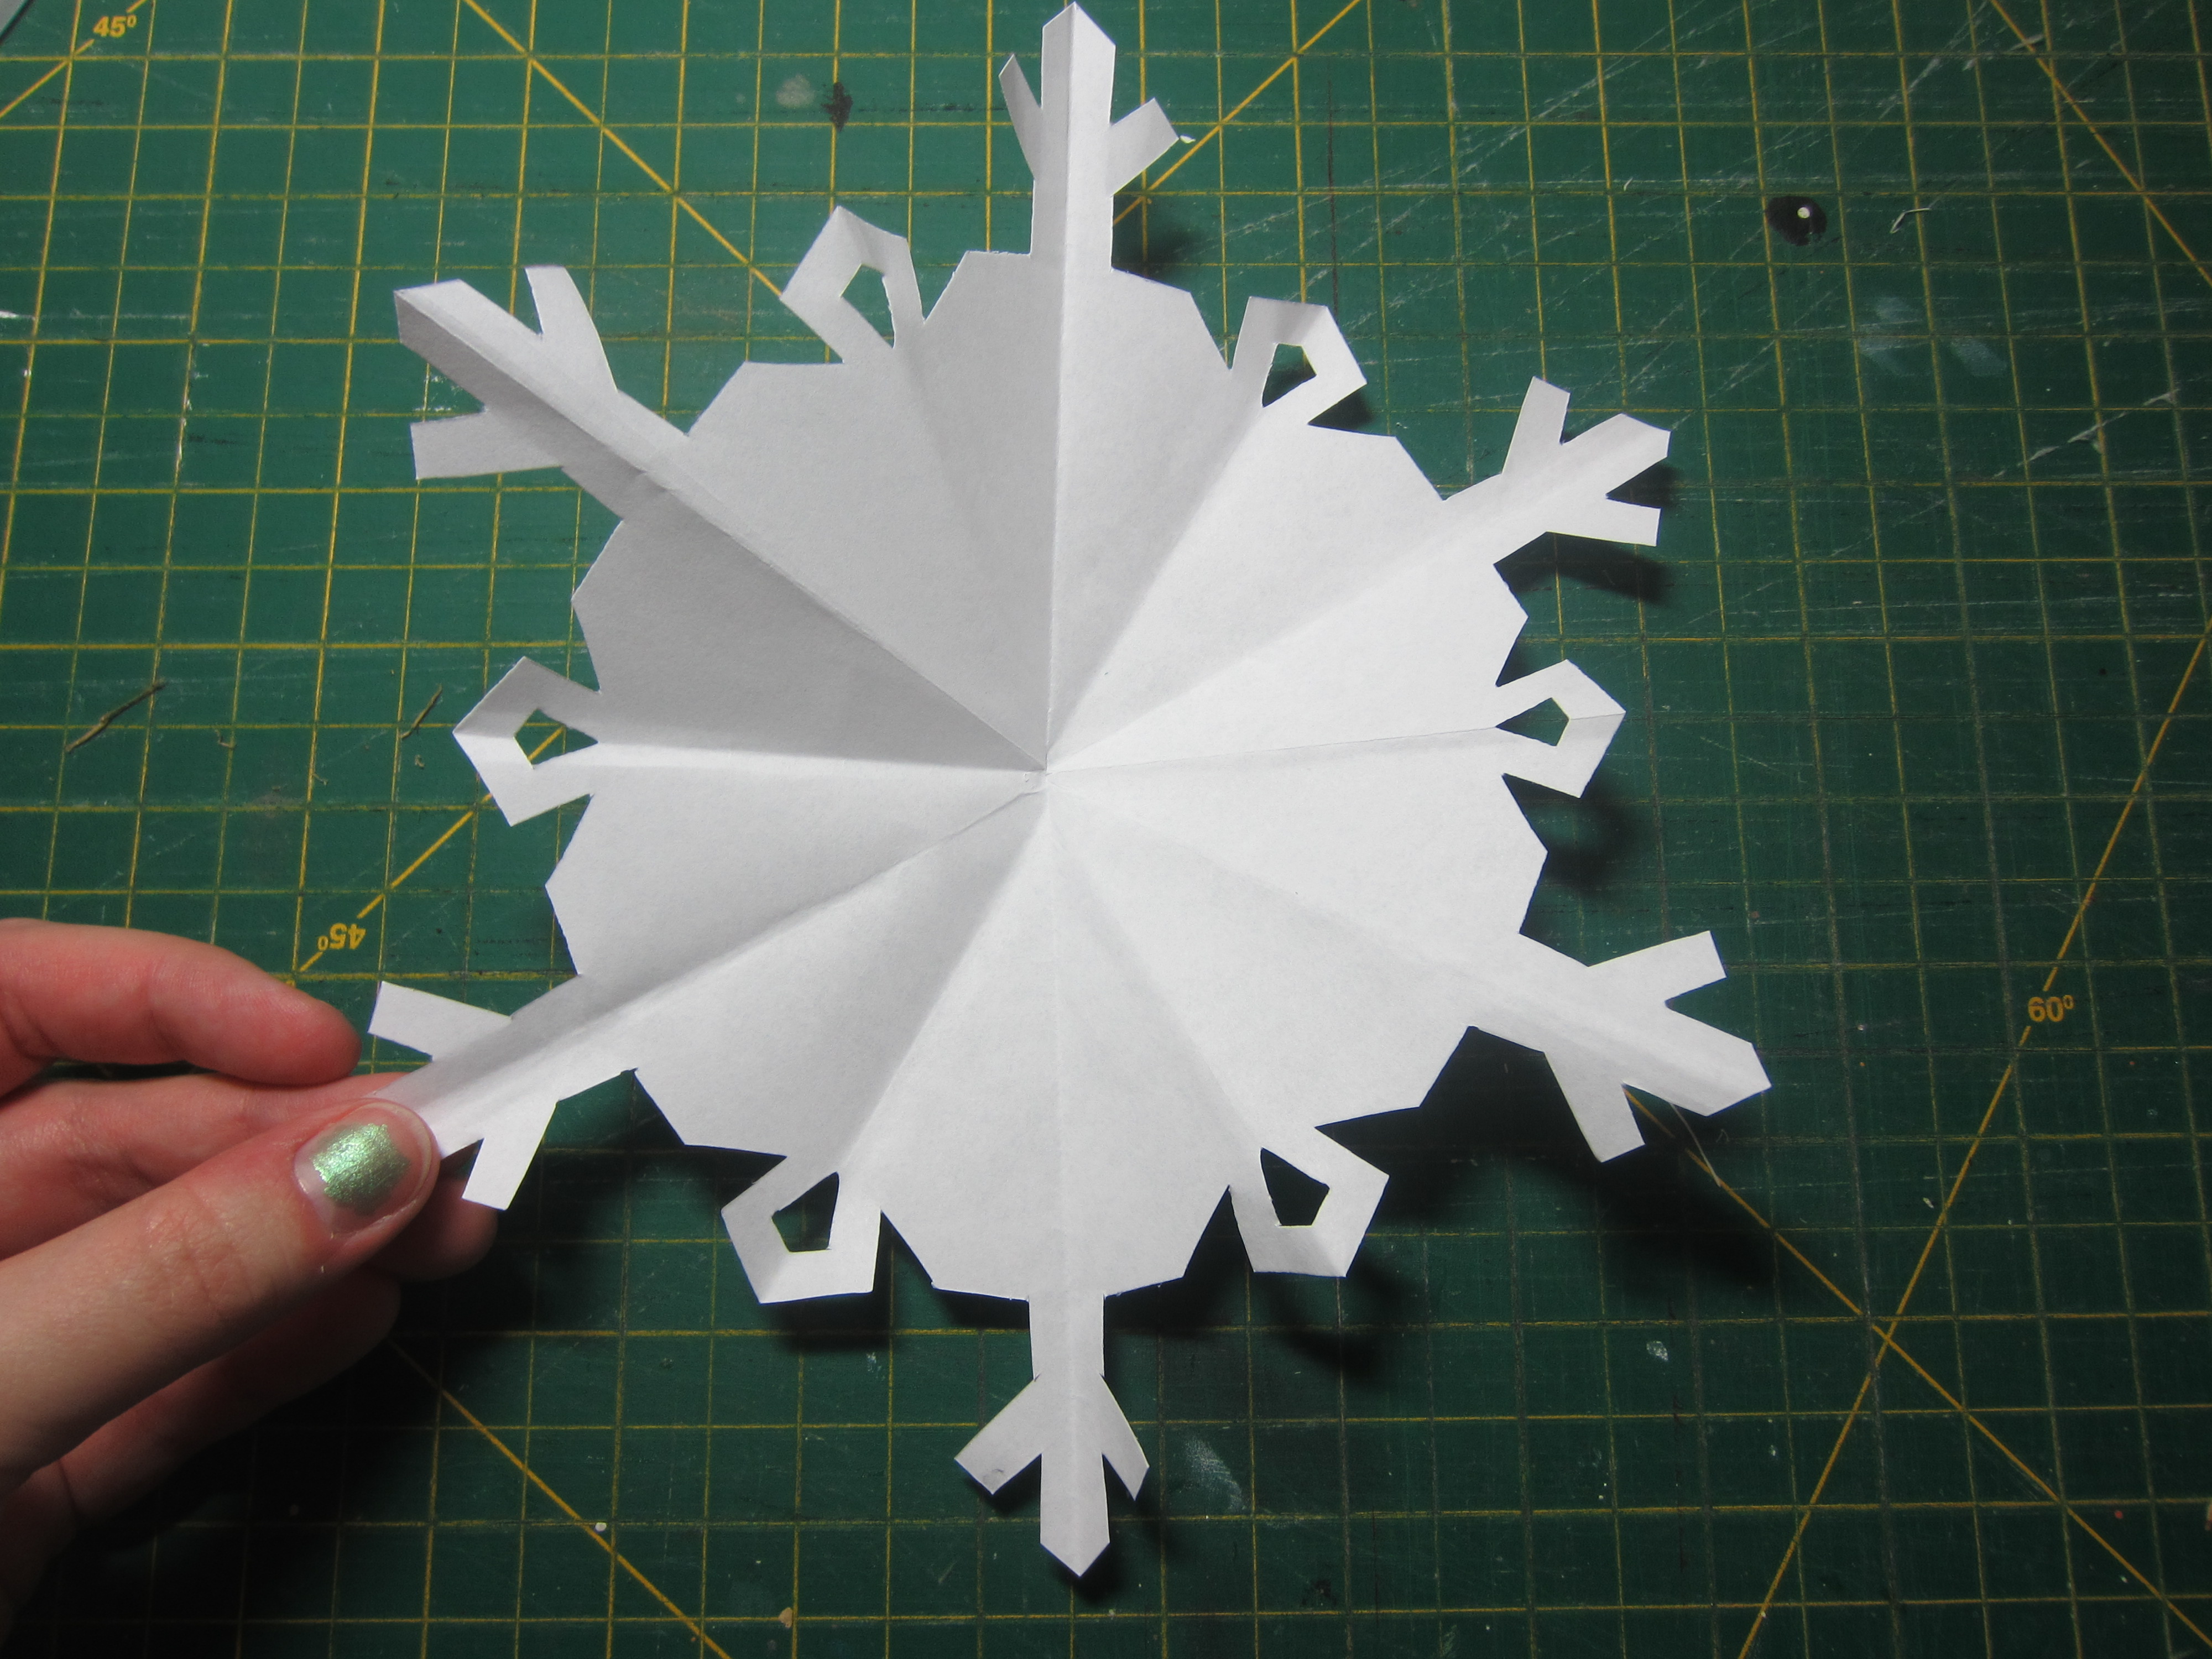
6. Here’s where your snowflake design begins to differ from the standard snowflake– the cutouts you draw need to be only on the top part of the design. Leave plenty of space underneath. This is the design I used for the Poirot snowflake.

7. Cut out the design with scissors (or the knife, too, if you have any fiddly bits you’re adding in) and unfold.
8. Here’s where the secret of the designs come in, the element particularly dear to the heart of Poirot. You’ve been using radial symmetry (the sort that flowers have, for example) to make the snowflake. You’re now going to finish the design using bilateral symmetry (the sort of mirror-reflection symmetry that the human face has). In this case, we’ll do Poirot’s face.
I would recommend that, whichever design you choose to use or invent, to sketch out the whole thing first to get an idea of what you want the finished product to look like. Then fold your drawing in half to get a more accurate idea of what “half an image” should look like before you sketch it into the snowflake. I didn’t use any picture or model for my Poirot face, although I’ve drawn Suchet’s Poirot so many times I can probably render it in my sleep by now. This doesn’t matter– with the right clothes and moustache, the guy in your snowflake WILL be Poirot. Anyway, this is a paper snowflake, not a formal exhibit piece. 🙂
Fold the snowflake in half, the top point facing straight up. Line up the points as closely as you can before creasing, but don’t worry if they don’t align perfectly. Draw your design on, and any additional cutouts you want to add to the design.
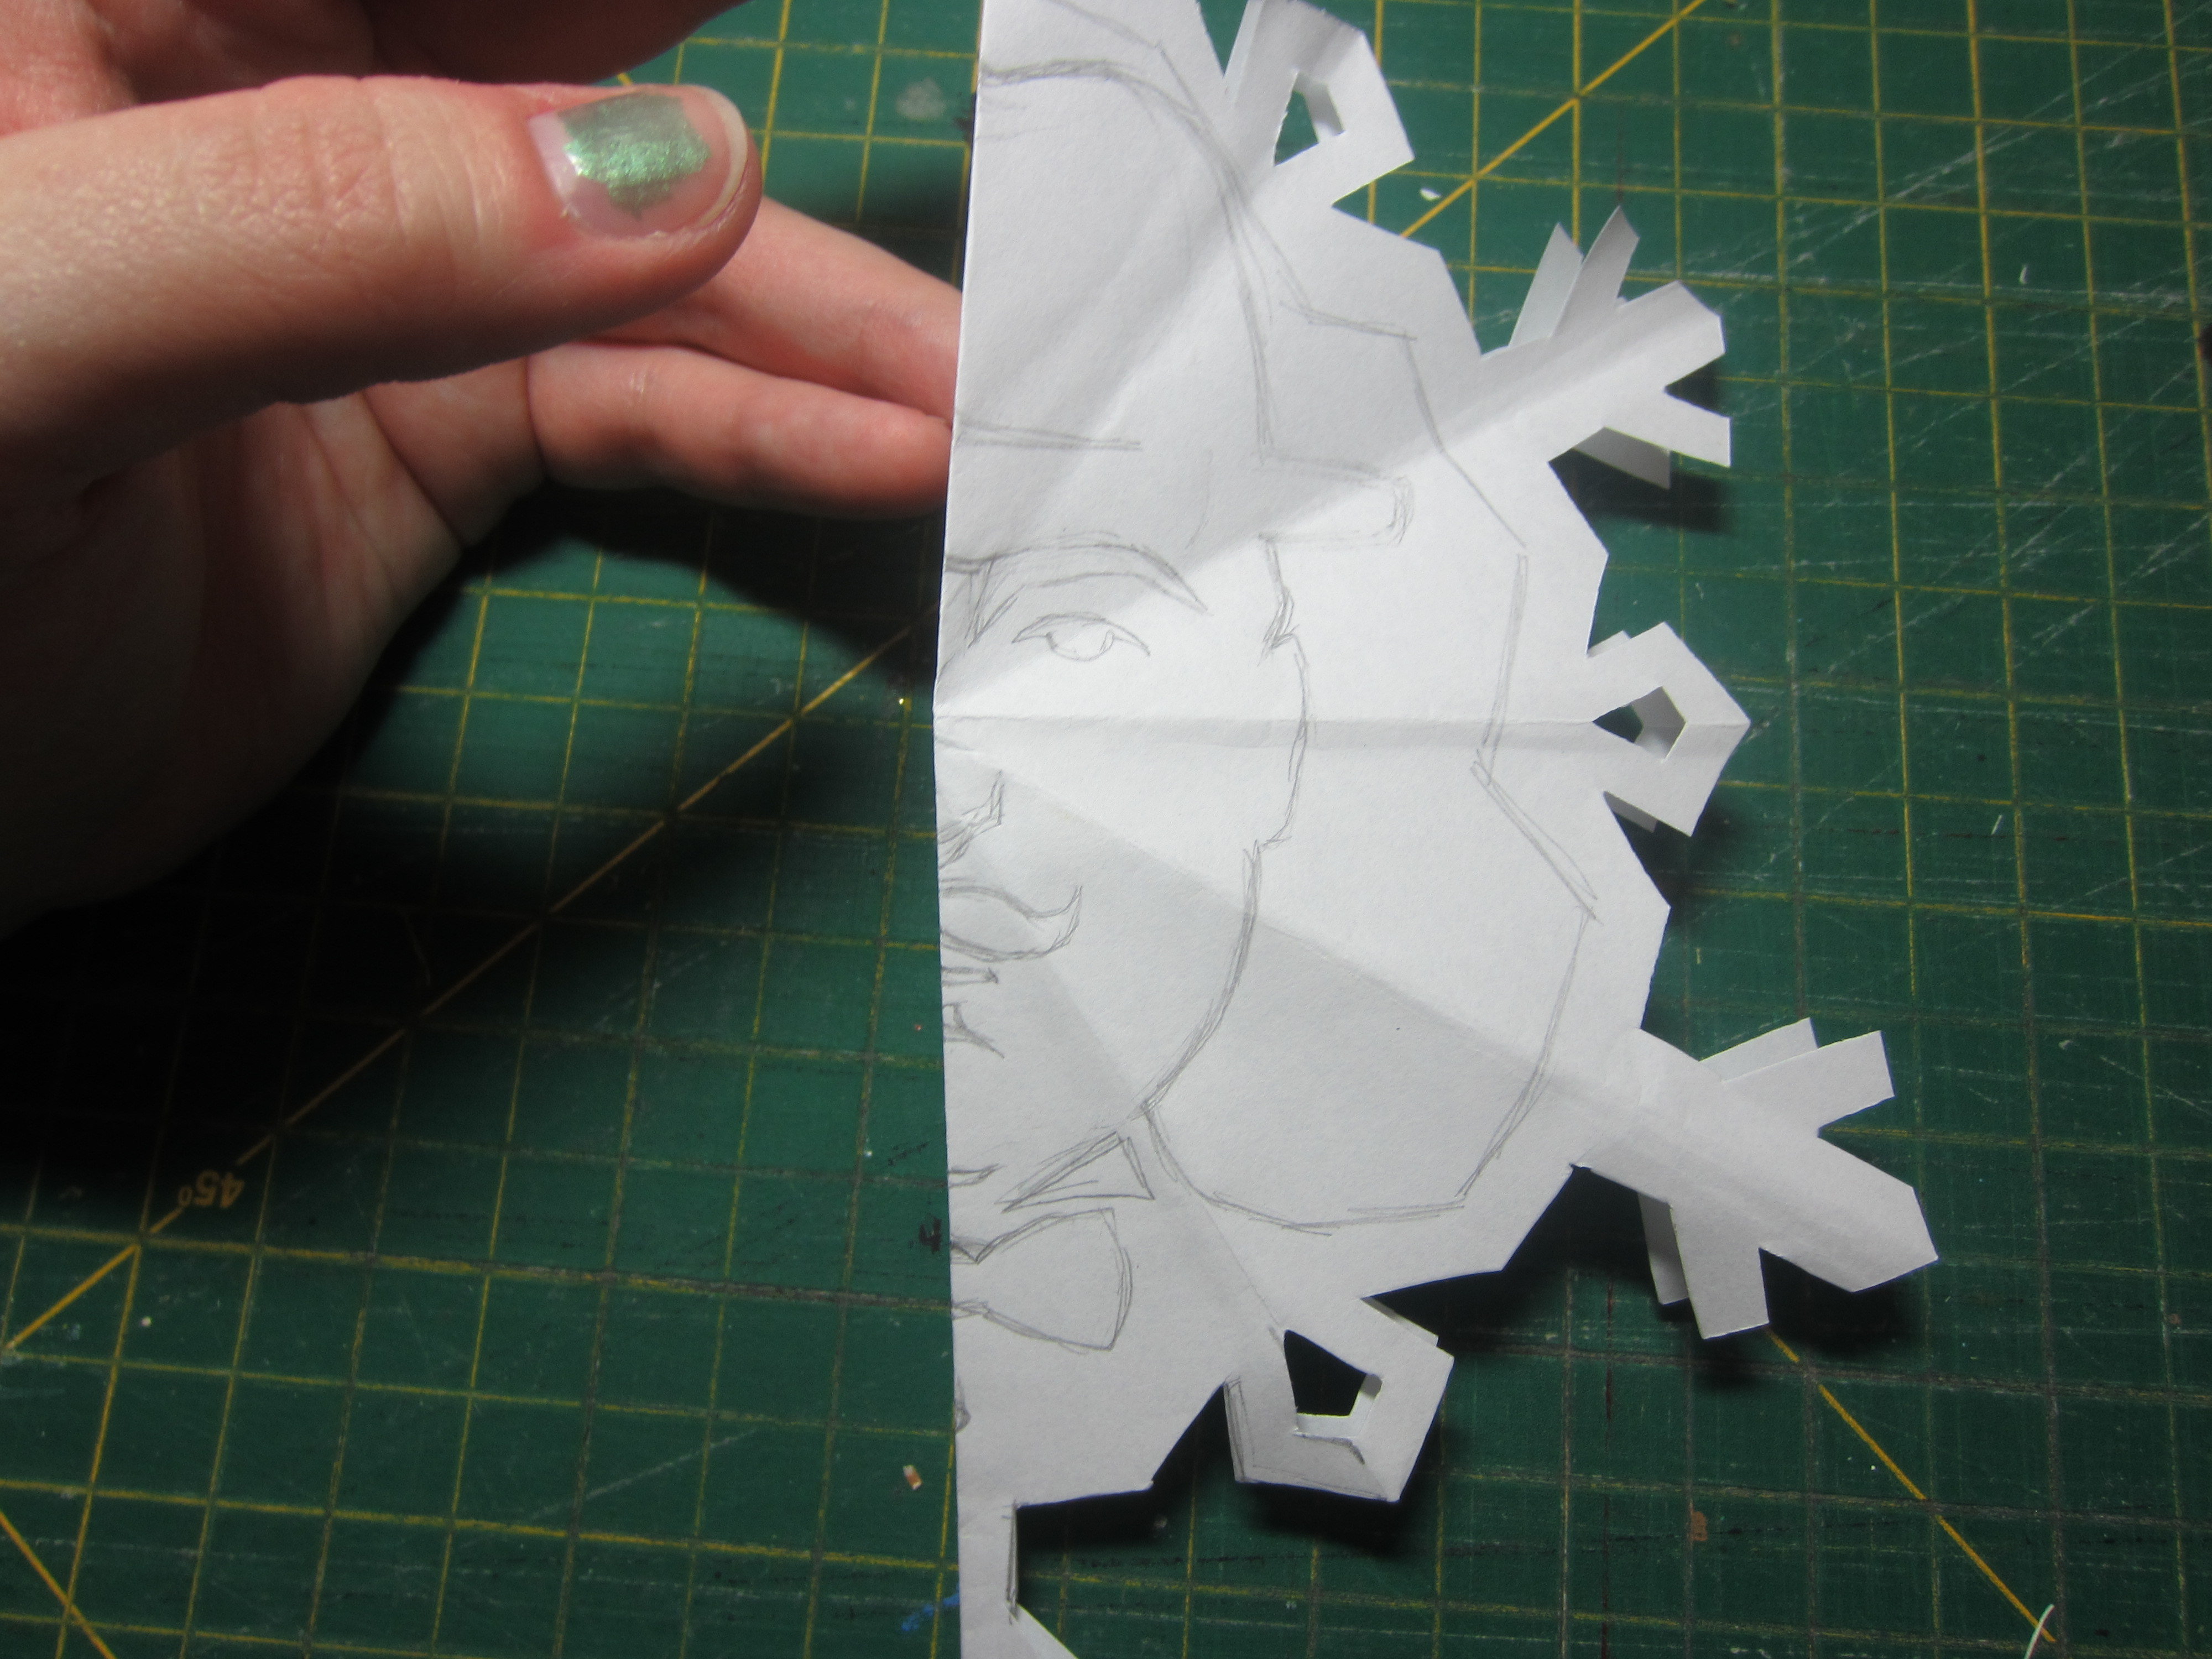
9. Carefully, carefully cut the design out with both scissors and your knife. Use scissors wherever possible, if you’ve got a good, small, sharp pair. In that larger area unreachable by scissors, I cut a small hole with the knife, and then finished the job with my little scissors. The eye and the wing collar were the only parts I needed to cut exclusively with the knife.
Unfold… and voilà! What facial symmetry!

There you have it… paper snowflakes suitable for a snowy evening of murder and mystery!

It is the moustache that gives his face such perfection of symmetry
LikeLike
I held out my hand for it. Poirot looked at me and sighed.
“If only – if only, Hastings, you would part your hair in the middle instead of at the side! What a difference it would make to the symmetry of your appearance. And your moustache. If you *must* have a moustache, let it be a real moustache– a thing of beauty such as mine.”
Repressing a shudder at the thought, I took the note firmly from Poirot’s hand and left the room.
-Peril at End House
LikeLike